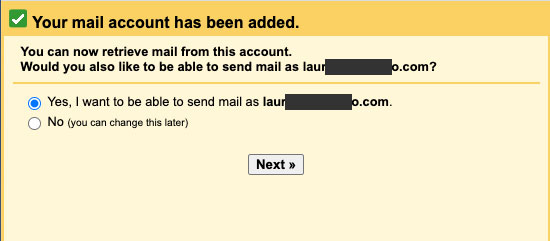
7. You should see a window that says “Your mail account has been added.” Make sure the selection is “Yes, I want to be able to send mail as yourname@yourdomain.com” Select “Next.”
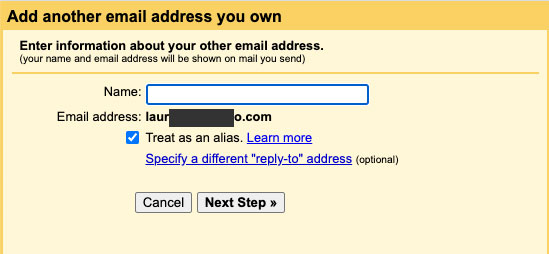
8. On the next screen, make sure the selection is “Treat as an alias.” Select “Next Step.”
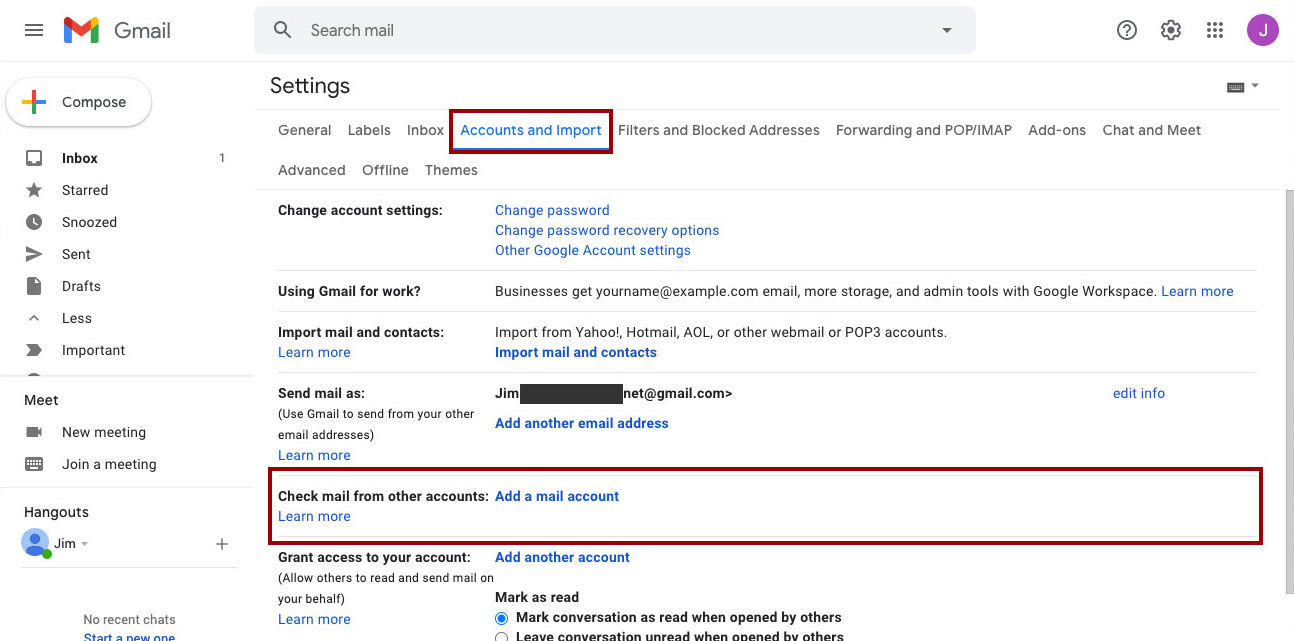
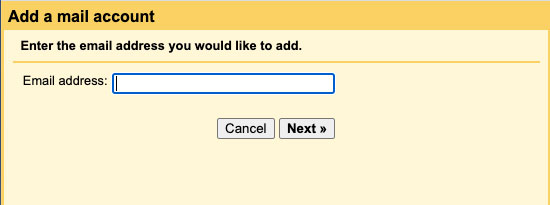
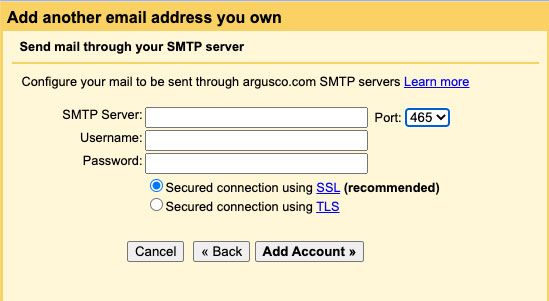
9. Configure Gmail so that you can send mail using the email account you just added:
SMTP Server and Port—from your email host
Username—normally, this is your full email. address, but sometimes it’s only the part that comes before @.
Password—the password that you set when creating your custom email address.
Make sure that “Secured connection using TLS is enabled.
Select “Add Account.”
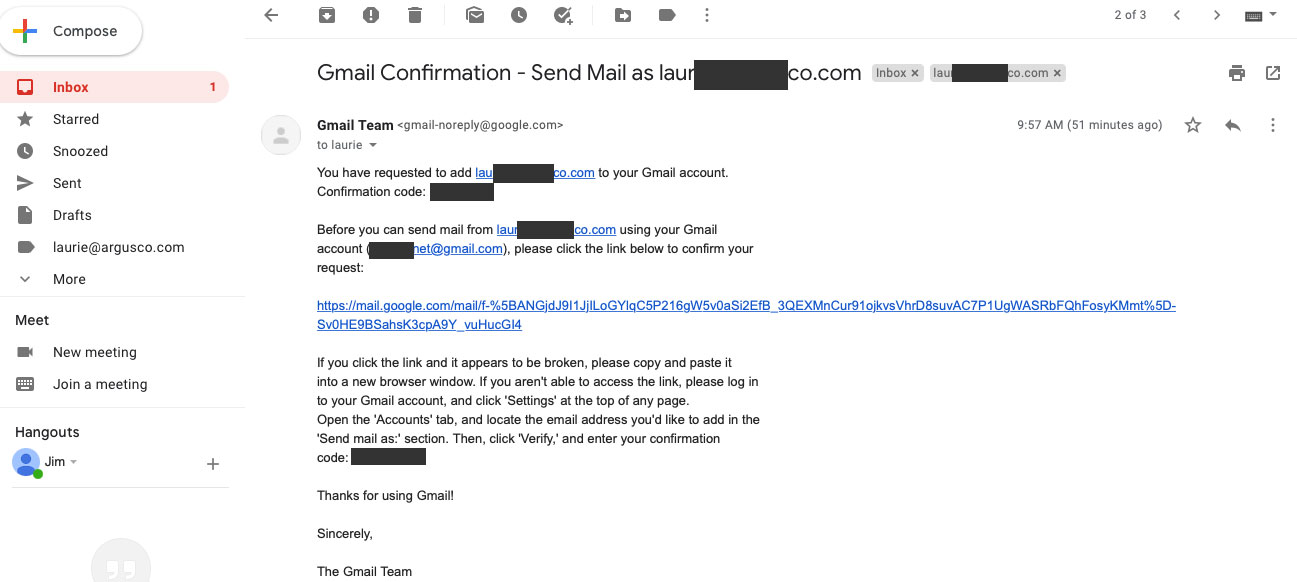
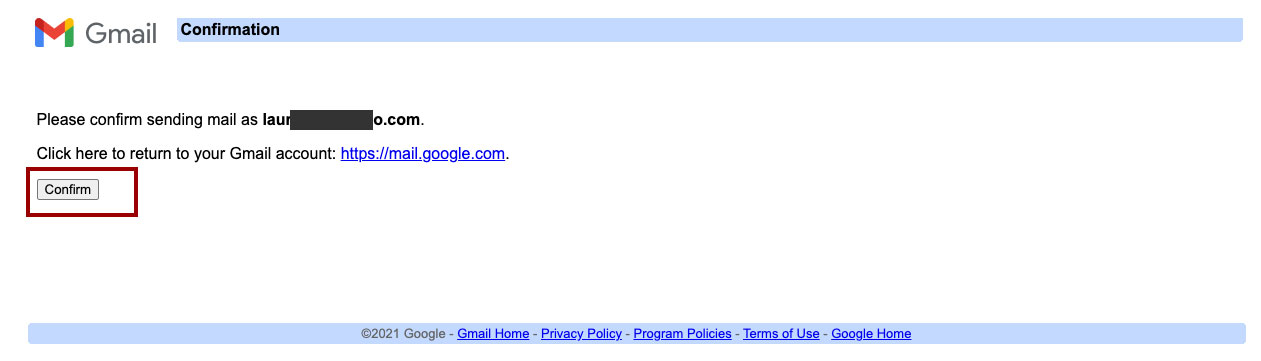
10. Check your gmail account for a confirmation email to verify your new email address. Select the confirmation link in that email and then select “Confirm”.
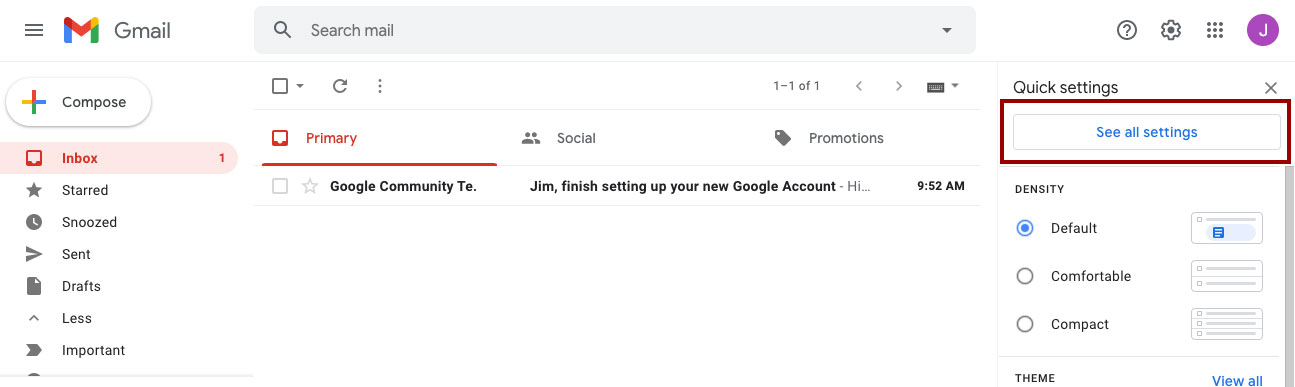
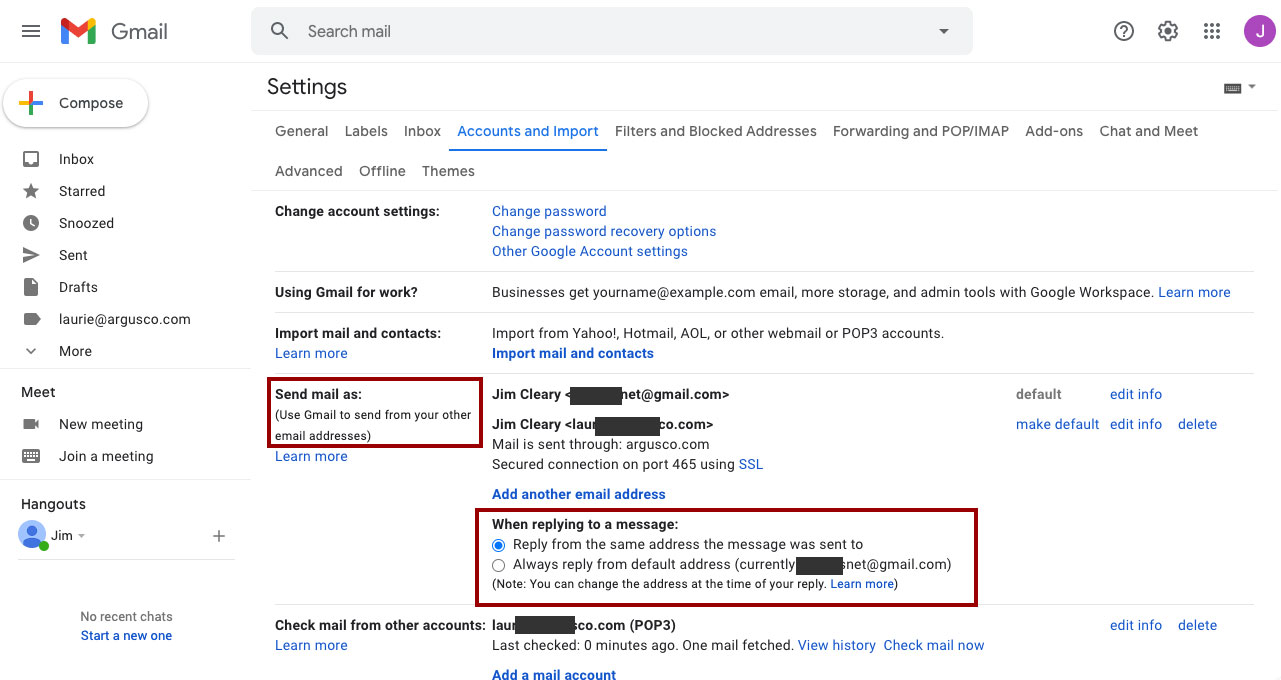
11. Go back to your Gmail Settings screen where you left the “Accounts and Import” tab open. Scroll down to the “Send mail as:” section and find the options for “When replying to a message:” Select this option: “Reply from the same address the message was sent to.“
You are ready to use your new email address! To send an email using your new address, open a new message. Go to the “From” field and select yourname@yourdomain.com from the drop down menu.